
Micrometer measurement tips
- Micrometer measurement basis
First let's take a look at the most common cursor micrometers.â– Standard mechanical outer diameter micrometer
The names of the parts and the names of the main parts are shown below: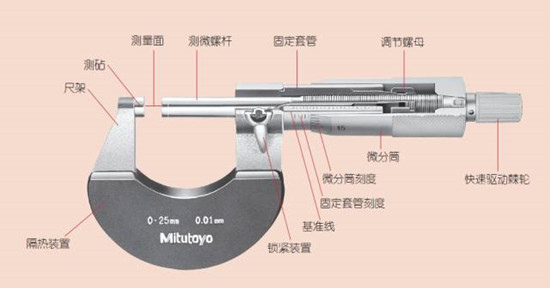
â– Standard mechanical micrometer measurement principle
The distance p (p = 0.5 mm) of the mandrel is divided into 50 equal parts by the differential cylinder (scale), so that the reading of one scale is 0.01 mm.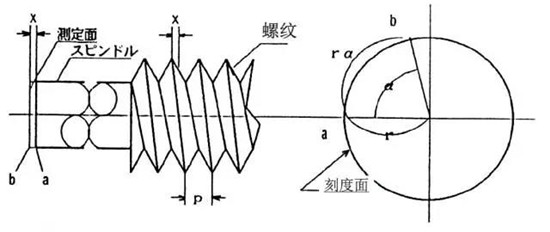 Measuring principle of standard mechanical micrometer
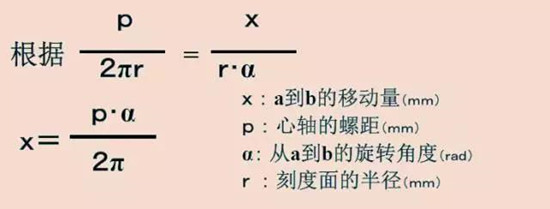 Calculation principle of standard mechanical micrometer
读 Reading of standard mechanical micrometer scale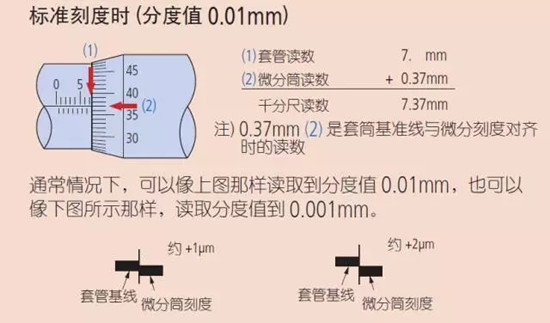
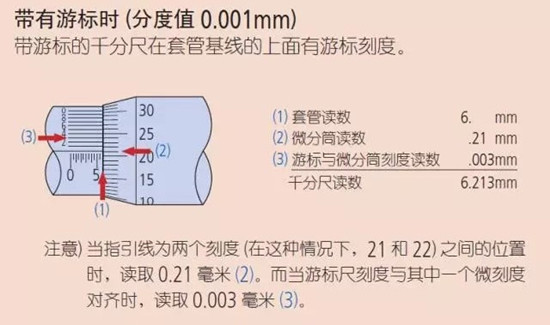
After the baseline is aligned, we can determine the last bit of the size by the position of the baseline.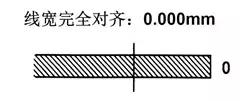
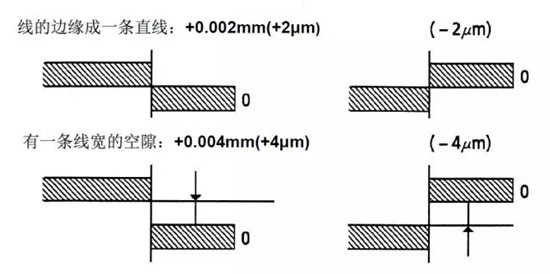
â– Digital display outer diameter micrometer
The basic structure is shown below.
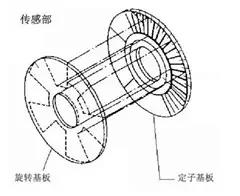
â– Digital display external micrometer measurement principle
The resolution is 0.001 mm, and the distance from the mandrel to one turn is 0.5 mm. The sensor (rotor, stator) is divided into 500 points, 0.5 mm ÷ 500 = 0.001 mm.
 Digital micrometer measurement principle
In addition to the above two common micrometers, there is one of the following outer diameter micrometers with a counter.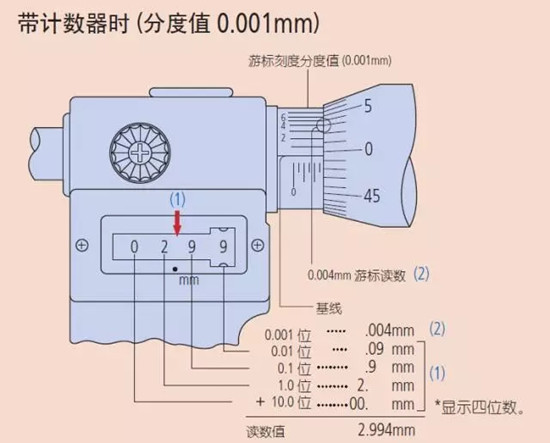
Micrometer force measuring deviceThe micrometer's force measuring device is also one of the most important components. Reasonable use can increase the life of the micrometer and improve the measurement accuracy.
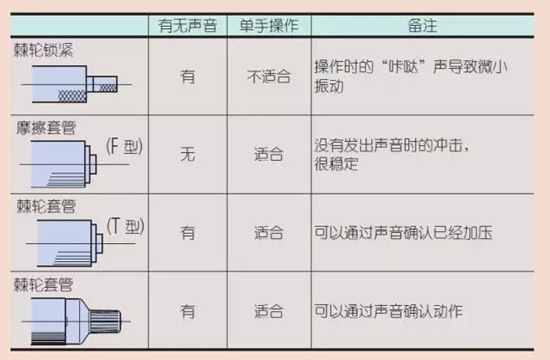 Note: This chart is from the introduction of the Mitutoyo micrometer force measuring device.
Precautions when using micrometer products
Now that we have introduced the basic construction and reading method of the micrometer, the most important thing is the precautions for the use of the micrometer and the maintenance and maintenance of the micrometer.
1. Carefully check the type, measurement range, accuracy and other specifications to choose the right model for your application.
2. Before the measurement, place the micrometer and the workpiece at room temperature for a long enough time to equalize the temperature.
3. Look straight at the baseline when reading the differential cylinder score line. If you look at the tick marks from a certain angle, the correct position of the lines will not be read due to visual errors.4. Adjust the starting point (zero) before measurement, and wipe the measuring surface of the anvil and micrometer screw with a lint-free paper.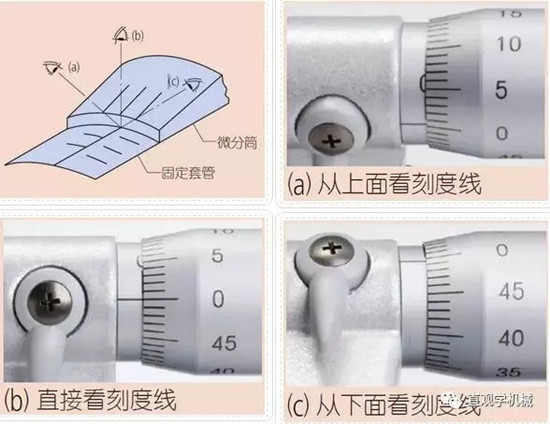
5. As part of your daily routine, wipe off any dust, debris and other debris around the environment and on the measuring surface. Also, carefully wipe any stains and fingerprints with a dry cloth.6. Use the force cell correctly to measure at the correct force.
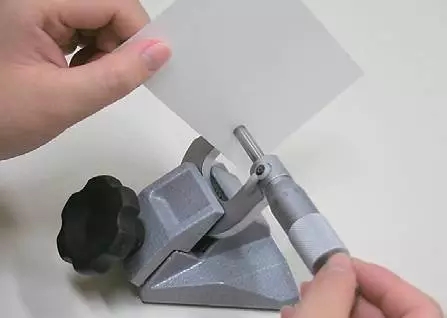
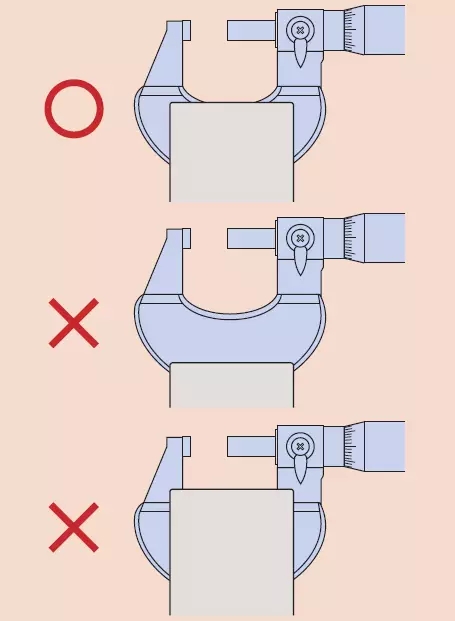
7. When installing the micrometer to the bench of the micrometer, the gantry should be fixedly clamped to the center of the micrometer frame. But don't get too tight.
8. Be careful not to drop or hit anything with a micrometer. Do not use excessive force to rotate the micrometer to measure the micro screw. If you feel that an accidental misoperation has caused the micrometer to be damaged, you need to check its accuracy before use.9. After storage for a long time or with a protective oil film, gently wipe the micrometer with a cloth soaked in anti-corrosive oil.
10. Storage Precautions: Avoid direct sunlight when storing. Store in a well-ventilated, low-humidity location. Store in a place where there is no dust. If stored in a box or other container, the box or container should not be placed on the ground. A gap of 0.1 mm to 1 mm should be left between the measuring faces during storage. Do not store the micrometer in a clamped condition.
Micrometer maintenance when using the product
First of all: carefully wipe the dirt and fingerprints stained in various parts with a dry cloth.
If it is stored for a long time and is dry without oil, use a cloth with anti-rust oil to rub a thin layer of oil. Although this may leave oil stains and spots on the alloy measuring surface, if it is not used for a long time, do so. Will ensure that your micrometer performance lasts.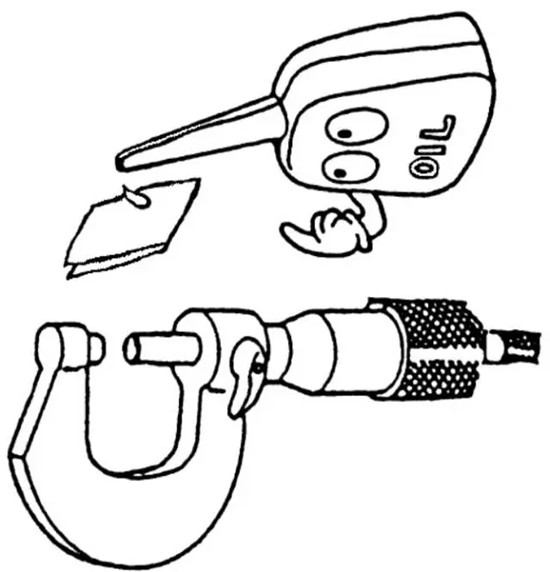
Finally, when keeping the micrometer, be sure to pay attention to the following points:
1. When storing, please keep it in a place where there is no direct sunlight, less moisture, good ventilation and less dust.2. Remember to keep it in the storage box, do not place it directly on the ground.
3. The most important point: keep the storage between 0.1-1mm between the two measuring surfaces, and do not lock the fastening device to prevent malfunction during storage.
150mm Wall Chaser Groove Cutting Machine
The 1700W 150mm Wall chasers are a twin bladed power tool which used to cut groove on brick, stone or concrete walls, perfect for electricians and plumbers, to lay wires or water pipes in the wall.
The 1700W 150mm Wall Groove Cutting Machine Chaser with Cutting Depth 10-40mm, cutting Width 14/19/29mm.
The Concrete Wall Cutting Machines With Spindle lock for easy blade change.
BTW, The Groove Wall Chaser Machine with Laser Function for cutting line straight.
The Wall Chaser work efficiency is much higher than the 5 blades wall chaser, and Less Dust with dust blower.
The 150mm Wall Cutting Machine is comfortable to use, due to anti-slip handle with soft grip cover.
150Mm Wall Chaser Groove Cutting Mchine,Best Electric Wall Chaser ,Brick Wall Chaser,Wall Cutting Machine
Ningbo Brace Power Tools Co., Ltd , https://www.cnbrace.com